Ingredients for - How to Temper Chocolate
How to cook deliciously - How to Temper Chocolate
1. Stage
Chop the chocolate and prep your work station: Chop 16 ounces of tempered chocolate into uniformly small (about 1/2-inch) pieces so it will melt quickly and evenly. Place 12 ounces of the chocolate in a large glass or metal bowl. Set the remaining 4 ounces of chocolate aside. Gather everything you’ll need for whatever chocolate project you’re working on: parchment-lined baking sheets, the things you’ll be dipping, garnishes, and any other tools required. This way you can launch right into it once your chocolate is in temper.
2. Stage
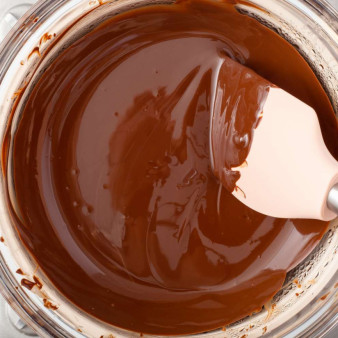
Melt the chocolate: Stovetop Method: Fill a medium saucepan with a few inches of water and bring it to a steady simmer. Set the bowl with the 12 ounces of chopped chocolate on the saucepan and stir constantly with a silicone spatula, until it’s mostly, but not quite all the way, melted . It’s best to melt the chocolate gently and steadily. Microwave Method: On 50 percent power, microwave the bowl for 30 seconds. Remove and stir with a silicone spatula. Keep microwaving the chocolate in 30-second bursts, stirring after each burst, until it’s mostly, but not quite all the way, melted. This can take around 3 minutes, depending on your microwave.
3. Stage
Allow the temperature to hit 100°F, then add the reserved chocolate: Remove the bowl from the heat. Insert the probe of the thermometer in the bowl; make sure it’s deep enough to get an accurate reading. You want the tip to be submerged at least 1 1/2 inches. You may need to tip the bowl a little to create a pool of chocolate that’s deep enough. When the temperature is 100°F, add the remaining 4 ounces of the chopped chocolate, stirring until all the chocolate is melted and it's reached the desired temperature: about 91°F degrees for dark chocolate and around 88°F for milk or white chocolate. You might feel like you’re stirring for ages. Be patient and it’ll pay off. When the chocolate is getting close to temper, it will get thicker, almost tackier. The chocolate at the edges of the interior of the bowl will start to harden. This is good!
4. Stage
Test for temper: To test for temper, dip the tip of a table knife or small metal spatula in the chocolate and set it aside. In a few minutes, it should be hardening. If it’s still wet, it's not tempered yet–keep stirring.
5. Stage
Use your tempered chocolate: Your tempered chocolate is now ready to use. Because projects like enrobing (dipping) can take a long time, your chocolate may set up and get too thick. If this happens, flash it back over the simmering water or in the microwave at 50% power again in short bursts (just a few seconds at a time) and stir until it loosens up just enough to work with. Too much heat and it will go out of temper! Scrape any unused tempered chocolate in a container and let it harden so you can use it later in recipes, or use it as seed chocolate for future tempering projects. What if your chocolate blooms as it sets? This can happen sometimes, even hours later. My advice is to pretend everything is cool and say nothing. People like chocolate and ideally no one will notice. If it’s only chocolate with nothing else dipped or coated in it, you can simply remelt the chocolate and try again another day with new seed chocolate. Or use it for other recipes, like brownies or tortes, where you’re not tempering. Did you love the recipe? Leave us stars below!
