Ingredients for - Quick Dinner Rolls
How to cook deliciously - Quick Dinner Rolls
1. Stage
Dissolve the yeast: Combine the milk and water in a measuring cup and warm in the microwave for 30 seconds, until lukewarm to the touch. Pour the liquids into the bowl of a stand mixer and stir in the sugar and the yeast. Set aside for 1 minute or until the yeast has dissolved and you see a few small bubbles starting to pop up in the liquid. There’s no need to wait until the mixture is foamy unless you’re worried that your yeast might be expired, in which case let stand for 3 to 5 minutes until foamy.
2. Stage
Knead the dough: With a stiff spatula, stir 3 1/2 cups (420g) of the flour and salt into the liquids until you form a shaggy, floury dough. Using the dough hook attachment, knead on low speed for 5 minutes, until it comes together in a smooth ball, or knead by hand for 10 minutes. If after 30 seconds of kneading the dough sticks to the sides or bottom of the bowl, sprinkle in 2 tablespoons of flour and knead another 30 seconds. If it still seems sticky, repeat. Be careful of adding too much flour; it’s better for the dough to be a bit sticky than for it to be too dry.
3. Stage
Let the dough rise: Lift the dough from the bowl, use your hands to gather it into a ball, then return it to the bowl. Cover with plastic wrap or a dinner plate and let rise for 10 minutes. If you’re pressed for time, skip this step!
4. Stage
Meanwhile, preheat the oven to 400°F. Set a rack in the lower-middle position. Spray a glass or metal 9x13-inch baking dish or cake pan with cooking spray or rub it with butter.
5. Stage
Shape the rolls: Turn the dough out onto a clean counter. The dough should feel soft and tacky at this point; if it’s sticking to your hands, dust the surface of the dough lightly with flour. You shouldn’t need to add any flour to shape the rolls, but it’s ok to use a light dusting of flour on the counter and your hands if the dough is sticking too much. Divide the dough into 15 even pieces. Shape each into a ball by cupping your palm over the top and rolling it in tight circles against the unfloured counter. The surface should be smooth and taut, like a water balloon.
6. Stage
Let the rolls rise: Transfer the shaped rolls to the prepared pan in 3x5 rows, with the rolls spaced a little apart. Cover and let them rise for 15 minutes. The rolls may look slightly puffy at this point, but it’s ok if they don’t.
7. Stage
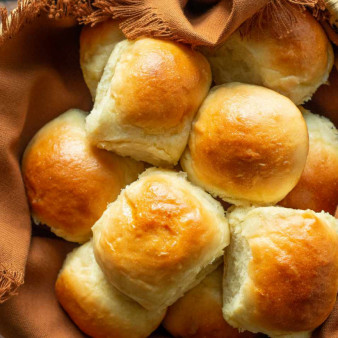
Bake the rolls: Brush the tops of the rolls with melted butter. Transfer to the oven and bake for 15 to 18 minutes, rotating the pan once halfway through so the rolls bake evenly. When done, the rolls should be puffed and deep golden-brown on top.
8. Stage
Cool briefly and serve: Cool the rolls briefly in the pan, then use a spatula to lift the rolls from the pan. Transfer to a wire rack until cool enough to serve. Leftover rolls can be kept in an airtight container for 2 to 3 days, or frozen for up to 3 months. Did you love the recipe? Leave us stars below!


